I've been talking way too much. Yesterday I said to myself, "For tomorrow's entry you've got to make something, bake something or get out and go somewhere."
I decided to make something. Next week we're going to bake something really cool using one of my crazy expensive $30 cake pans and hope that it turns out. Next Tuesday we're going to go somewhere. Mark your calendars because Donna Neiler, whose gorgeous gardens and outbuildings are featured in the May/June edition of Cottage Living has invited my readers over for a private tour. Trust me, it's spectacular.
And so, we're going to make something together. I think you're really going to love this. I call it "Make & Take Cake Plate", because if you were here in my community I'd invite you over and we'd actually make them together so that you could take one home.
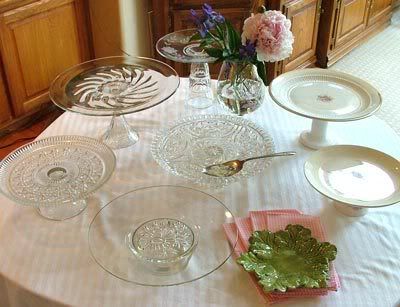
I love cake plates, I have lots of them. But they can be a bit expensive even when you find them in a thrift shop or estate sale. My sister developed a method of making them and we've made lots of them. I like to create tablescapes when I entertain. What that means is that I arrange things on the table in different levels, even if I have to tuck a box or pan under the tablecloth. Different height of cake plates allow you to do that without any fuss.
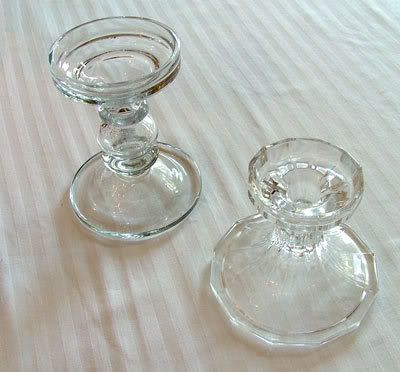
The first I did yesterday was to take a quick trip over to Goodwill. I came home with two candlesticks that will be perfect for our project. You want something that has some weight or is wide at the bottom so that the plate will be stable. These were 99 cents each. The candlestick on the left was a bit dirty on the inside and there was no way to get in there to clean it. So here's a tip: Fill a pan or container with just enough water to cover the candlestick. Drop in one or two denture cleaning tablets. Let it stand for a couple hours. The inside should be perfectly clean.
I also found some glass plates. These were between 99 cent to $1.99. Pay attention to the underside of the plate because you're going to glue the candlestick to the bottom of the plate and you're going to need surfaces that are flat to flat.
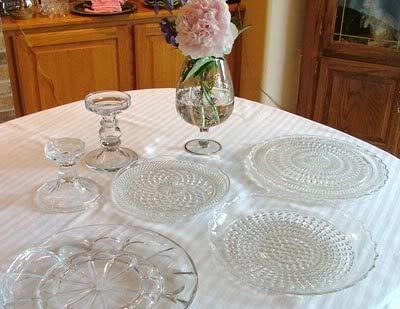
This plate will be a bit of problem because the hobnail design means there's no flat surface to adhere too. This will simply be the flat "bottom feeder" of the tablescape.
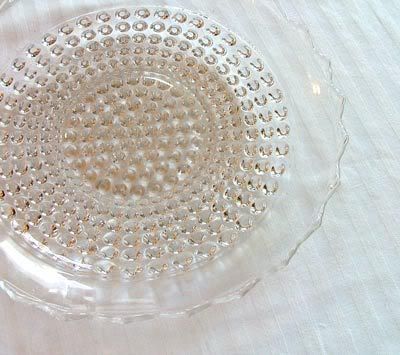
For this type of glass you're going to need the two-part epoxy glue. It's two tubes side by side and you mix the two to create the chemical reaction. This is much stronger than the single tube epoxy.
Turn your plate upside down. Decide which side the of the candlestick you want to attach to the bottom. Center it, making sure that the two surfaces will make good contact. Mark around with a china marker if you wish, otherwise just eyeball it. Spread the glue on the candlestick and quickly turn upside down onto the plate. Take a q-tip and wipe off excessive glue. A little bit won't be a problem and you actually want a little welling up to make a good seal. Don't worry, this is underside and no one will see it. Follow directions for drying time.
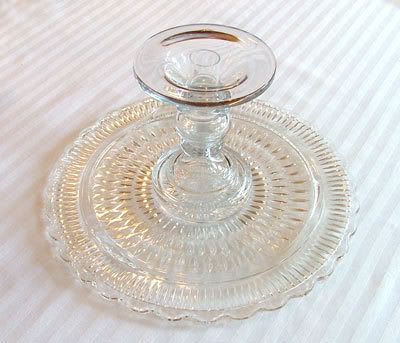
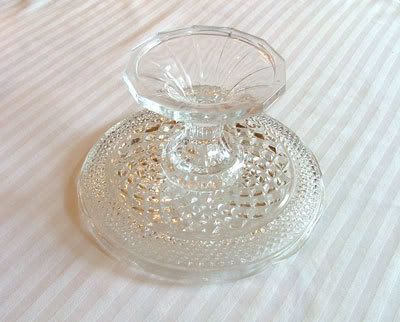
You're done. It's that easy. Here's the two cake plates we just made.
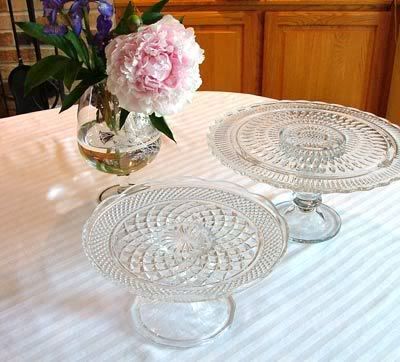
Now you can really get creative. Think of different things you can use for the base. Here's an old fashioned soda glass used as a base:
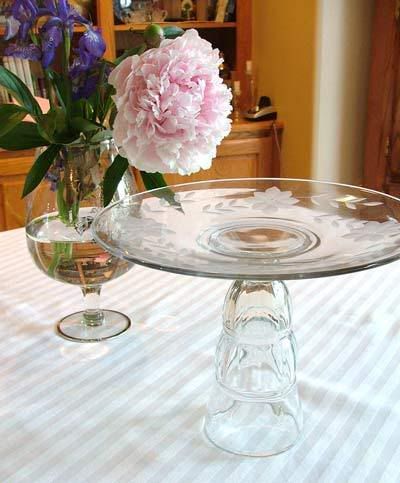
A plain glass bowl makes shorter cake plate. This is one of my favorites. It's tall, thin and elegant.
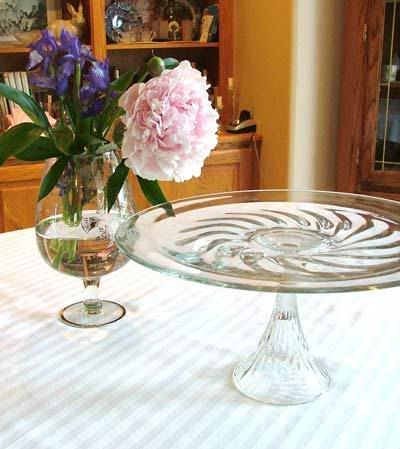
Don't just think glass. These were made with dinner plates. This one uses a similar design flower pot as the base:
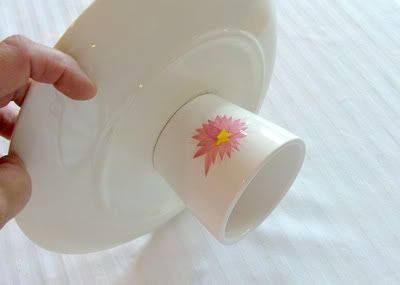
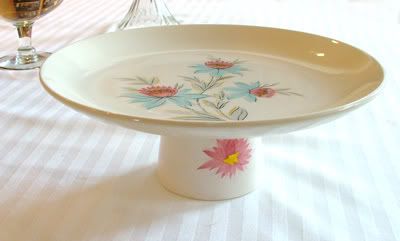
If you use dinner plates for your project then you might want to try White Gorilla Glue. That's what we've used. Don't use too much Gorilla Glue because it bubbles up as it dries.
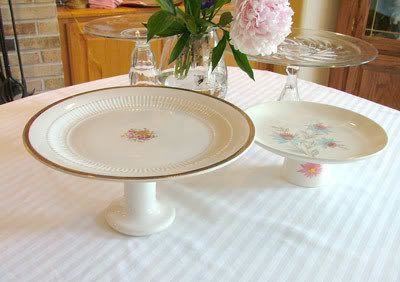
I don't run these through the dishwasher or allow them to soak in water. I hand wash and dry immediately. They've all held up really well.
These aren't just for serving dessert, although I have been known to throw dessert parties. Think about displaying tea sandwiches for a tea party, or plates covered with cupcakes.
Let me know if you actually make one of these cake plates. Post the photo on your site and we'll have a show and tell.
Thanks for visiting and participating in the Make and Take.
NOTE: Early this morning I'm off to photograph this house being moved to nearby LaFox. The last building I saw being moved created some interesting problems that had to be solved on site. Should be fascinating.




33 comments:
You're brilliant! Those look absolutely fantastic.
I'm wondering if Liquid Nails would work for glue...must check that out.
Thanks so much for a great hint. I'm looking forward to the garden tour!
Wowsers! That's a great idea. I will certainly send you a photo. I'm off to find some plates!
Oh what fun -- now I have something else to shop for! LOL I am in awe of your organizational and planning skills -- I never know from one day to the next what I will write about. :) I'm looking forward to the tour, too.
xoxo,
Mary
FABULOUS!! You've given me the perfect excuse to go to the thrift store...as if I needed one. Hey, could you use a silver tray? Would the Gorilla glue still work?
Love the cake plates! The idea of leaving a wonderful Make & Take gift is genius!
Thanks for sharing! I'm off to the thrift store too!
Cheers! Chris
oh man...this is fun! My creative muse is turning cartwheels at the possibilities!
Will share with with #1 as we make wedding reception preparations.
I agree with Vee - you're brilliant!
I'm going to make one! I love those...very creative!
Have a great weekend...
Hugs,
Robin
Wow Suzanne, being fairly new to your site I had no idea that you had such great craft skills! I can't wait to make these, I love cake stands and they can be pricey. You are indeed, A Woman Of Many Talents. Could be a new blog title!
Great cake plates. Such a wonderful idea! Can't wait for the tour.
Those turned out great! I bought a couple things on eBay that I thought were authentic, but they had made a base with candlesticks just like thi. No matter though because the items were lovely anyhow, and I loved the pieces.
Kady
Hi Suzanne,
Love the cake plates, good institutions and pitcures.
Linda
Vee - No, not me. My sister actually showed me how to do this. Currently I'm prodding her along to get a blog up and running. She's got so many great ideas to share. Liquid nails might work, try it.
Marie - I'm looking forward to seeing what you come up with.
Mary - I'm always glad to help. I knew you needed at least one more item on your list of things to look for when you're out shopping.
Heather - I'm going to try a silver tray myself. I'm thinking the two part glue might be the best. I've got to read the label.
Chris - Let me know if you find anything.
Paula - I know what you're talking about. Just looking ay the plates my sister created got my creative wheels turning.
Punkin - I'm glad you're going to try one.
Red Shoes - Oh my sister gets credit for this one, although I'll have to say that the two of us combined can be a creative force sometimes.
Robyn - The tour will be great. I'm editing the photos now.
Kady - I agree. Sometimes the creative combination that someone comes up with is better than the factory version.
Linda - thanks for stopping by. I'm glad you like the plates.
Thanks for stopping by, each and every one.
- Suzanne
Fabulous! Look out thrift stores, the crafty ladies are heading your way!
I have done a "cheaters" version of this by using a thin coil of wall adhesive clay (like they sell in office supply stores to use to hang up papers on walls without using nails)to attach a plate to a bowl or cup or ????
Even hot glue can be used for a one time usage. These tips are for heirloom items or for when you don't want to permanently alter an item. Another idea is dental adhesive! Sticks like crazy, washes off well too.
And may I suggest doing two or three or four layers of plates for a really showy display? Great for making a display flowers too!
Fabulous idea and while I'm not a particularly practical person, I kept wondering where you choose to store these gems? I'd really be interested in knowing.
My millinery friend - Oh....yes! My mind went to racing about having huge towers of these things. Well, not too huge or it would topple over.
Just Plain Jane - Luckily I have lots of storage areas in this house although I DO NOT have the butler's pantry I've always dreamed about. Most of my servings pieces are stored in the basement on industrial type shelving units. I save the zipper plastic bags that bedspreads and sheets are packaged in and tuck them inside of those. Alternately I drape the shelving unit with a sheet which can be removed and laundered. That seems to keep everything fairly clean until the next use.
- Suzanne
This is an awesome idea! Love cake plates. I have a couple but I could make more now that I see how it can be done, thanks!
Love your cake plates! I'm going to make some!! Thanks for the great instructions!
Sherry
What a wonderful idea! I don't think I have seen this before, and I can't wait to try it. I guess I'm going to have to make another trip to Goodwill!
These are great!!! What a great idea.
Great idea! I am wondering if the glued pieces are coming apart in the dishwater???
Where were you when I got married and needed a cake plate?? I love this :)
OH my goodness YOU are brilliant!
I see someone already said that. But I really mean it!
What a fabulous idea. Thanks for sharing it with us. I am new to your blog and came over from DebraK of The Bunnies Bungalow.
Alison
Love your beautiful ideas. These will be beautiful for a tea I have coming up.thanks so much for sharing.
What a great idea! I am going to shop around and find the perfect plate and bottom. I'll have to go and buy some glue but what fun this will be!
Nancy
What a great idea!! I'm off to the thrift shop on Tuesday, to see what I can find. Will let you know how they turn out.
In fact, I'm thinking this may be a good project to do with young Taylor. She can make one for her Mum.
Awesome! I baked a cake for the 4th, just because. First one in many years. I had to sit it on an oversized plate. I have been searching for a unique, colorful and fun cake plate. As usual no luck, but the crafty brain cells kick in and I decide I need to make one-like so many other wonderful ideas I come up with. Found your site and gave me some solid 'how-to's" to move forward. Glad I found the creative source at the Farmer's Wife's page.
Crafty beach bum from Florida
These are just so beautiful! Thanks for sharing the tips for creating them.
My daughter-in-law and her mother made these plates a few years back. They used them as centerpieces (with fabulous desserts from a local bakery) at her baby shower. Three per table in various heights ----- they were a big hit!!!!!
I am -so- excited to have stumbled across this idea of yours! I've been stressing over where to find inexpensive cake plates for my upcoming wedding, and, VOILA! Solution! I think this idea fits in perfectly with our Southern Vintage theme! Thank you so much for the idea!!!
Thanks so much for sharing these fantastic craft ideas! I've been looking for 2 & 3 tier dessert plates and found they cost a fortune for plain looking ones - now I can make my own. Will be checking back to your site frequently! Wishing you a Happy Holiday Season & a Happy New Year!
This.is.awesome.
A friend from Christmas to the Max just posted the link for these wonderful plates! I actually have been planning to make them for quite a while- I have the candleholders sitting on top of my refrigerator and the epoxy is bought and in the craft room. Now I have read a easy to follow tutorial - I guess I better make them! then I can cross another UFO off my list ! Cant wait to have a gander at all the rest of your goodies! Thanks!
Post a Comment