Showing posts with label cooking. Show all posts

Wednesday, April 13, 2011

Let's Bake Some Green Martian Alien Scones

I've mentioned that my mom is coming here to spend the night on April 28th so that we can rise early and watch the royal wedding together. Mom is fond of all things royal.

My plan was to invite some of my neighbors but since the furniture hasn't arrived that plan has gone up in smoke. As it is, my mom and I will be sitting on those fold up camping chairs, watching the TV that's in the only piece of furniture in the room.

I've been planning the treats that we'll be munching on, including tea cakes, scones, clotted cream (a close version) and homemade lemon curd. Last week I pulled out Cory Amaro's scone recipe and whipped up a test batch.

COREY'S SCONE RECIPE

Let's get started baking scones that quickly turned alien.

Gather the ingredients, have the recipe handy.

Photobucket
Flour, sugar, salt, baking powder, baking soda, butter, egg and yogurt.

I faced a dilemma in the grocery store. For the life of me I couldn't remember if I had used plain or flavored yogurt the last time I baked these scones. Hmmmmm, I decided that blueberry scones would be delicious. The scones are about to turn alien.

Mix the dry ingredients. To this add the cold butter and cut it in. I love to use my vintage pastry tool.

Photobucket

Add the egg. Room temperature is best.

Photobucket

Fold in one small container of yogurt. Plain or vanilla is nice, blueberry will produce aliens.

Photobucket

Mix just until blended.

Photobucket

Flour your work surface and turn the dough out. Here's the secret to a soft texture - knead very lightly and just pat into a circle. Cut with a juice glass.

Photobucket

They didn't look too bad at this point. They were a light bluish purple color when I put them into the oven.

Photobucket

But they came out a very odd blue/green color when they were baked. Martians!!

Photobucket

No matter, they were delicious with a dab of butter and they were soft and moist the next day.

Photobucket

I'm not quite sure what the real difference is between a biscuit and a scone. I love them both. Give the recipe a try and let me know what you think.



Saturday, January 8, 2011

Tales of the Mac and Cheese

Will you do me a favor? Please stop me if you've heard this story before. At this point in life I'm starting to repeat myself and my children are starting to give me that look. You know, the one that translates into any number of messages including, we've heard this a hundred times before, you're embarrassing us, or that's dumb, dumb, dumb.

Macaroni and cheese is such an iconic comfort food and I have any number of recipes for the dish. These range from basic and simple to recipes that call for $22 worth of cheeses. The expensive dish is good but come on.

When I worked at the newspaper there were always a number of young interns and recent college grads. One was a sweet young woman we'll call Cassie. She had recently been ill and was recovering from the flu. We were talking in the break room and she said, "I just want to go home and make some mac and cheese. Not the cheap stuff but the good stuff."

This got me to thinking. She was young and a recently graduated from college. I couldn't imagine college students cooking up a big batch of mac and cheese from scratch and so I asked, "What do you mean, the good stuff?"

"You know, the one that has the squeeze packet of cheese."

Oh my goodness! You can imagine my reaction.

"Look Cassie, I'm going to put together a casserole of REAL mac and cheese and we'll see what you think. OK?"

Cassie got her mac and cheese, and the recipe to go along with it. I don't know if she ever made it or not but at least I tried. Call me the Johnny Appleseed of mac and cheese.

My friend Vee has posted a really good version of macaroni and cheese. Pop over to her place and check it out. It's simple, it's easy and I'll guarantee that it doesn't cost $22 to make.

VEE'S MACARONI AND CHEESE WITH HAM

Have a wonderful weekend everyone.


Thursday, October 28, 2010

Taffy Apple Sundae

One a year I allow myself a special treat from Alice's Place. It's a tiny ice cream stand, one of the best parts of life in a small town. People living in town can walk, or in the case of one spunky senior citizen, ride your Hover-round in search of soft serve cones.


In the fall Alice's serves up Taffy Apple Sundaes. They are worth the wait. Take a look and see if you don't agree.

Photobucket
Taffy Apple Sundae

It is served in a hamburger take-out container because it tends to get too messy in a sundae cup.

The warm caramel sauce starts to melt the ice cream and the salty nuts mingle with the sweet caramel and the tart apple. It's heaven. Take a closer look.

Photobucket

Now that you're longing for a taffy apple sundae, and realizing that it's way too far to drive, I'll show you how to make them at home. It's easy.\

Here's my instructions, republished from last year.

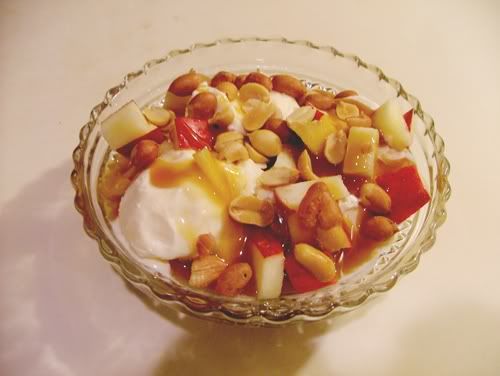
First, find some nice serving bowls. I have some wonderful pressed glass bowls from Goodwill that are just the perfect size.

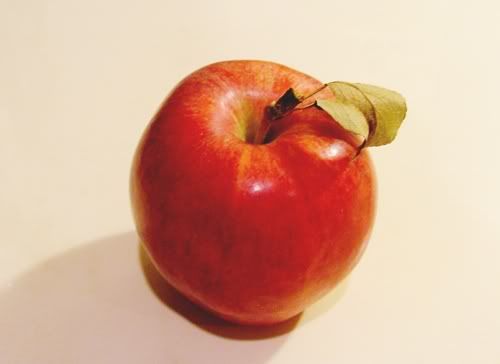
Next we're going to need some apples. Normally I use Granny Smith apples but today I'm going to use what I have on hand.


Cut the apple into bite size pieces.

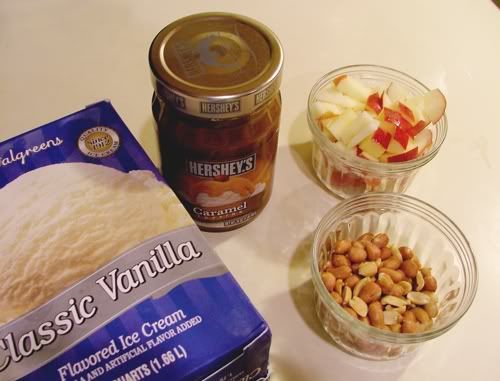
To assemble the sundae we're going to need vanilla ice cream, caramel sauce, chopped apple and Spanish peanuts.


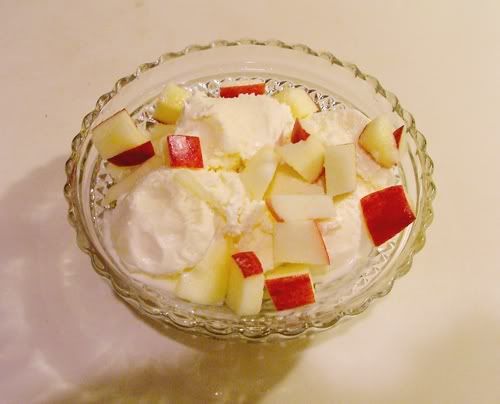
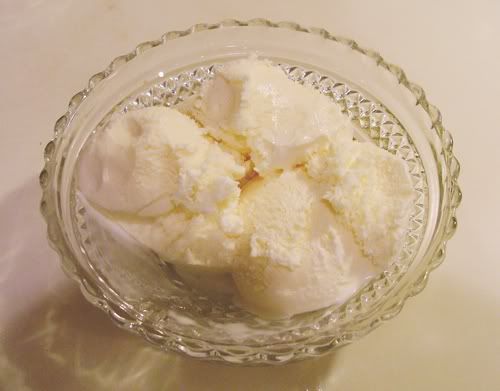
Put several scoops of vanilla ice cream into the serving bowl.


Sprinkle with chopped apple.


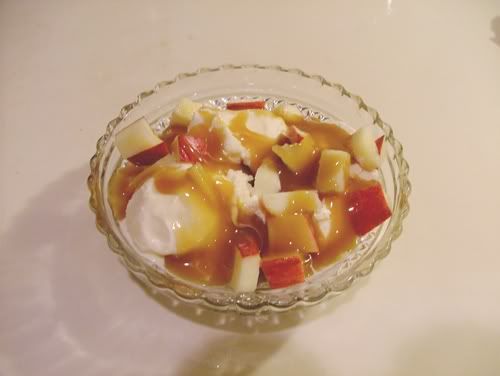
Drizzle caramel sauce on top.


You can heat the caramel sauce if you wish, but it tends to melt the ice cream really fast.

Sprinkle with a good dose of Spanish peanuts.


Dig in!!

These peanuts weren't salty enough for my taste. I like that sweet salty taste of a real caramel apple.

This would be fun to serve if you're having a Halloween party.

- - - - - - - - - - - - - - - - - - - - - - - - - - - - - - - - - - - - - - - - - - -

The other wonderful thing about living in a small town is that a place like Alice's serves as a community information center. Taped to the window are all kinds of announcement, pronouncements and invitations, including a public invitation to the retirement of a local man.

Here's an flyer for a Swedish Meatball dinner being sponsored by the Swedish American Children's Choir. The flyer begins with the phrase, "If you loved our pancakes, you're gonna love our meatballs!"

That's making me regret I missed the Swedish Pancake breakfast because although Swedish meatballs are good, they just can't compare with the pancakes.

Have a great day everyone. Thanks for visiting with me and taking time out of your busy day. Try the Taffy Apple Sundae and let me know what you think.
Photobucket

Wednesday, October 20, 2010

Cider Doughnuts

We've talked about cider doughnuts for a couple of days and some of you have expressed interest in this yummy treat. I dug around in my recipe card files and came up with a recipe to pass along to you. I haven't made doughnuts in many, many years although I still have a vintage aluminum doughnut batter dispenser somewhere in the kitchen cabinets. That's a black hole, let's not go there.

APPLE CIDER DOUGHNUTS
Makes 18 doughnuts and doughnut holes.

1 cup apple cider
1 cup granulated sugar
3 1/2 cups flour
2 teaspoons baking powder
1 teaspoon baking soda
1/2 teaspoon ground cinnamon
1/2 teaspoon salt
1/8 teaspoon ground nutmeg
4 tablespoons butter (room temperature)
2 large eggs
1/2 cup buttermilk

Put the apple cider into a saucepan and boil until it is reduced to 1/4 cup. (about 30 min.) Allow to cool.
Cream the butter and sugar together in your mixing bowl. Add the eggs, one at a time, beating until well blended. Add buttermilk and cider the 1/4 cup of reduced cider.

Stir the flour, baking powder, baking soda, cinnamon, salt and nutmeg together in separate bowl. Add the dry ingredients to liquid ingredients, stirring just enough to combine.

Transfer the dough to lightly floured work surface and sprinkle the dough with flour. Roll out the dough until it is approximately 1/2 inch thick. If the dough is sticky, work in a bit more flour.

Cut out the doughnuts using a doughnut cutter. Arrange the doughnuts and holes onto a cookie sheet. Refrigerate for 20 to 30 minutes.

Pour cooking oil into a saucepan to a depth of at least 3 inches. Heat the oil to 350 F (check with a frying or candy thermomenter).
Fry doughnuts until golden brown, turning once or twice. It should take about 1-2 minutes per side.

Remove the doughnuts with metal tongs or a slotted spoon and set on paper towels to drain.
While still warm, shake a few at a time in a paper bag containing cinnamon sugar.

Cool on a rack OR eat while still warm.

ENJOY!!

Sorry no pictures of hot sugared doughnuts. You don't seriously think I have time to make the doughnuts! Well, not this week anyway.

NOTE: Thanks to all the fabulous blogs that are posting pictures of their fall decorations. My goodness they are beautiful. I'm loving those white, blue and even grey natural pumpkins. Unfortunately you're not going to find anything around here besides a ratty fall wreath on the front door. When the kids are grown and you're plumb out of enthusiasm for that type of thing, it falls by the wayside. Oh well, there's always NEXT YEAR!


Tuesday, July 13, 2010

Grilled Corn on the Cob

It seems like forever since we've cooked together. Yesterday for breakfast I served you grilled corn on the cob and now we're going to make some together.

In a pinch I'll husk corn and boil it on the stovetop but it's certainly second choice to doing it on the grill.

First the corn must be soaked in salted water. I'm making four ears and they fit nicely in the sink. We've made hundreds of ears for a picnic, in which case you'll need a barrel. Just make sure the container is large enough for the number of ears you'll be doing.

Photobucket

Let the corn soak for at least a couple of hours. The husks need to be totally soaked.

Fire up the grill and allow the coals to get hot.

Photobucket

Remove the corn from the salt water and place on the grill.

Photobucket

The coals were very hot and the husks began to char a little too quickly and so I moved them off to the side. Put the cover on the grill to keep the heat in.

Photobucket

Let them roast for about 5 minutes, turn and roast some more. The husks will get charred. The husks will release the water as they heat up, steaming the corn inside.

While the corn is grilling we're going to mix up the secret ingredient - mayonnaise!! I know, I know, it sounds awful, but trust me on this.

For the four ears of corn I mixed together 1/3 cup mayonnaise and the juice from 1/4 of a lime. Stir in a pinch of ground red pepper (cayenne). Mix well.

Photobucket

When the husks are nicely charred on each side, remove from the grill and bring inside.

Photobucket

Pull back the husks. Don't pull them off because they'll be your "handle" when you eat the corn. The sillk will pull off easily at this point.

Brush the mayonnaise mixture on the corn, using half of the mix.

Photobucket

Return the corn to the grill. At this point I put the ham steak on also.

Photobucket

Turn the corn, grilling till the kernels start to brown.

Photobucket

Now it's ready to eat. Brush on more mayonnaise mixture if you wish.

Our visit to the Mexican tapas restaurant sent me in search of the secret of their roasted corn dish. The waiter certainly wasn't giving it up. I found that corn prepared with mayonnaise is a street vendor treat in certain parts of Mexico. It's even more delicious if you can find the Mexican herb called Epazote. Mix a small amount of Epazote with butter and rub the corn with the Epazote butter in the first step, instead of the mayonnaise mixture. Use the mayonnaise mixture in the second step, after you grill for the final time.

NOTE: Don't use the mayonnaise made with canola oil. It tends to have a globby texture. Sorry, that's the only way I can describe it - globby.

I'm sure this would be super-delicious using my all time favorite, Blue Plate Mayo, but alas, it's only available south of the Mason-Dixon line. You know what that mean..... I need to take a road trip!!

I hope you give this a try. Let me know what you think.


Thursday, May 20, 2010

Bacon Candy

Yes, you read that right. Bacon candy. That's what I served with sweet potato pancakes at the Monday Morning Staff Meeting. I thought it would be a good pairing. What did you think?

Normally I serve Bacon Candy as an appetizer but this time it was for breakfast. Bacon is the new darling in the world of chefs. You can find bacon in all kinds of recipes. A local chef has it on the menu as Chicken Fried Bacon. The bacon is dipped in batter and deep fried. It's absolutely delicious and different.

There's only one business in our little community and that's Pete's Hot Dog place, out on the main highway. He serves a pork bomb called the Pork Producers Sandwich, which is a gut busting combination of boneless pork chop, ham and bacon, topped with cheese on a bun. Overload.

In nearby Chicago they held a Bacon Fest. Remember, Illinois is a big pork producer and when I was a kid Orien Samuelson would read the commodities numbers on WGN radio very early in the morning, ticking off rates for corn, soybeans and pork bellies.

When my stepsister arrived in the U.S. from Australia to do a six month walkabout after finishing medical school, she vowed to eat bacon for every meal. She was raised in the U.S. until the age of 10 at which time my stepfather had accepted a job down under. She fondly remembered the bacon of her childhood and assured me that there's nothing like it in Oz.

So, that's what she did. She ate bacon at every meal and every opportunity. She at bacon with pancakes, bacon sandwiches for lunch and for dinner we got creative and added bacon to salads or carbonara. I'm pretty sure she tried to smuggle bacon on the plane.

Here's how to make bacon candy!

BACON CANDY

10 slices of regular bacon (not thick sliced)
1/3 cup of brown sugar

Sprinkle brown sugar over the bacon and press down firmly so the sugar sticks to the bacon. Place on a wire rack over a foil lined baking sheet. Bake in a 350 degree oven for 15-20 minutes until crispy. Let bacon cool and harden. (I didn't have a wire rack so I just baked them on a foil lined pan and it worked fine, just drain on paper towel after baking).

Photobucket
Arrange bacon.

Photobucket
Press in the brown sugar.

Enjoy!

Photobucket

Do you love bacon?

Saturday, January 23, 2010

Let's Go in the Kitchen

I can't think of a thing to talk about today, so let's go into the kitchen and cook.

Today I'm going to share a very easy recipe that I served at my recent dinner party. I've had this recipe for years and can't recall where I got it. It's a perennial favorite.

Many years ago we attended a pot luck party at the home of a friend. The brandied carrots were a hit and as usual, I'd brought a double or triple recipe, there was some leftover in the baking dish sitting on the kitchen counter. One of the guys made a beeline for the carrots and stood in the kitchen munching on the leftovers, carefully lifting each matchstick carrot and plopping it in his mouth.


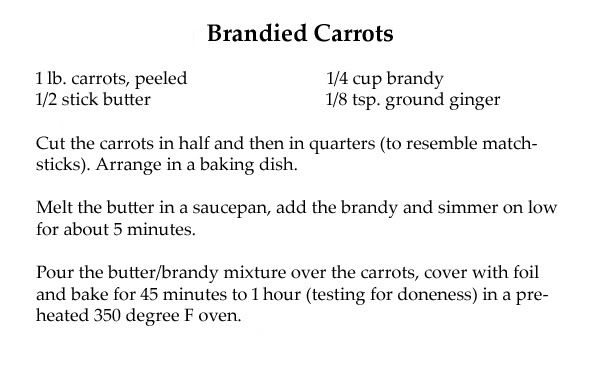
PRINTABLE RECIPE

Many of my older recipes do not have indications of how many servings. I'd say that this one feeds 4-6 people. I made a double batch for the party (6 guests) and I had plenty of leftovers.

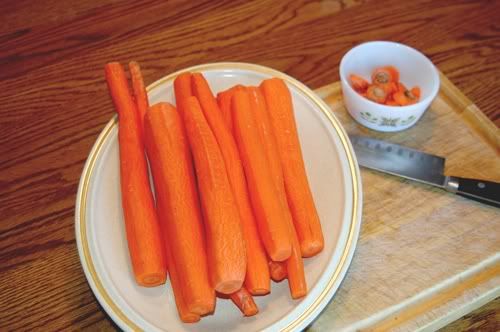
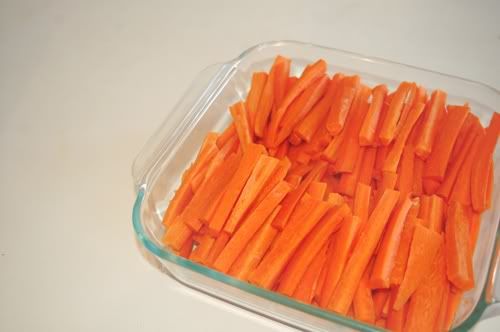
Peel your carrots, cut in half lengthwise and then in quarters.


You'll end up with something that is like a matchstick cut, but you don't want them really thin, just quarter the carrot.

Arrange them in a baking dish.


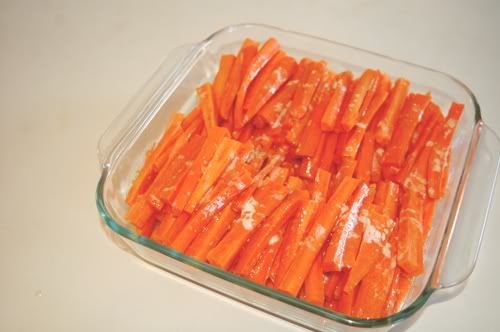
Melt the butter, add the brandy and the ginger. Heat at a low simmer for about 5 minutes and pour over the carrots.


Cover the baking dish with foil and bake in the over for 45 minutes to 1 hour. The baking time depends on how thick your carrots are. Check for doneness at about 45 minutes.

If you wish a little bit sweeter carrot, add a small amount of sugar or brown sugar to the butter mix.

Try these and tell me what you think. They're very easy since they can be baking in the oven with your meat.


Tuesday, January 19, 2010

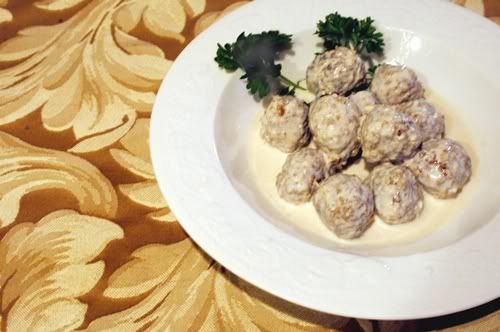
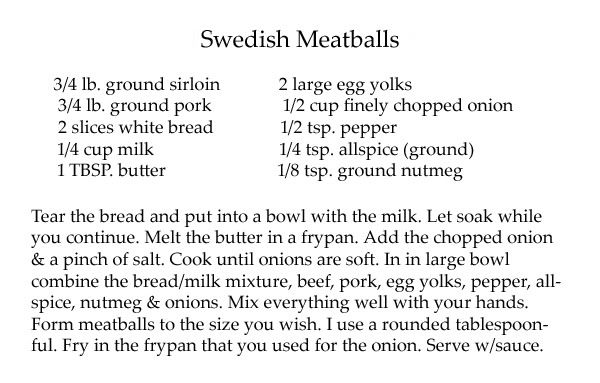
Swedish Meatballs

Last week's Bunco party was a success and now it's time to pass along those recipes.

First, thank you to those who gave me hints on how to create a link for printable recipe. I'm a little technologically challenged, but I figured it out.

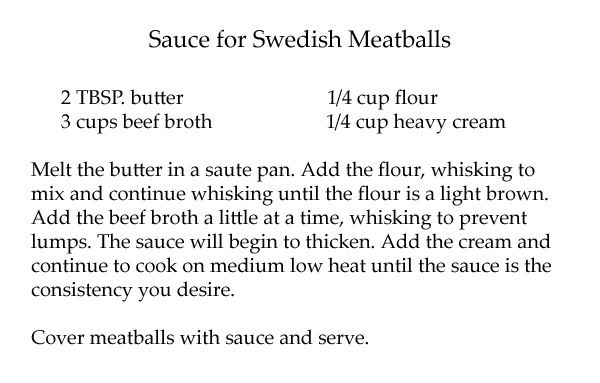
Lisa asked for the recipe for the Swedish meatball sauce. I'm also providing the recipe for the meatballs. I had a lot of menu items to prepare for the party and in an effort to budget my time, I actually purchased a bag of frozen Swedish meatballs at IKEA.

"Food? At IKEA?" my friend asked.

Yes, IKEA has a food department that carries specialty Swedish items. I passed on the herring floating in different sauces, and the salmon paste and cavier packaged in tubes resembling toothpaste. The ginger cookies looked interesting, as did the Lingonberries, but I left the store with nothing but the meatballs.


If you don't have an IKEA nearby, you can make your own Swedish meatballs.


PRINTABLE RECIPE

Here's the recipe for the sauce.


PRINTABLE RECIPE

TIP: When forming meatballs, continually dip your hands in cold water.

When making a sauce with a flour base, always cook the flour while stirring. If you don't cook the flour your sauce will have a gummy flavor and texture.

Thanks for stopping by today. We're fighting the battle against cabin fever. It would be easier if I still had my snowmobile. I could race across the open cornfields under the moonlight. Believe me when I say that nothing can compare.

Friday, January 15, 2010

Today We Are Cooking

You've requested some of the recipes for dishes that were served at the dinner party and the Bunco night.

I apologize for the dearth of real-time photos but in preparation for the dinner party I was flying around the kitchen like a whirling dervish.

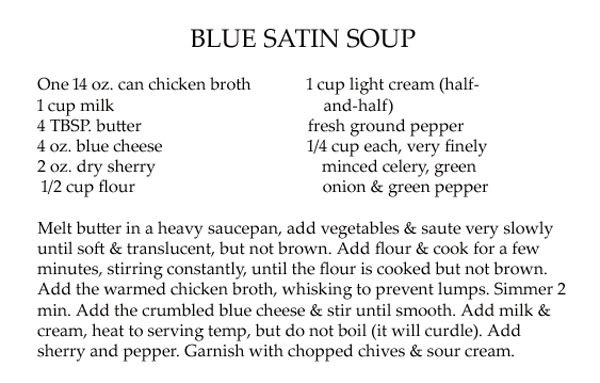
The most popular course at dinner was the soup. By the time we reached the dessert house it had reached a legendary status and everyone was asking me for the recipe.

As I served the soup, one of my guests admitted that she was not a fan of blue cheese. But after several spoonfuls she was a fan. It's not an overpowering taste, just a hint of blue cheese. Of course, if you like a strong blue cheese taste you could probably add more.

Grab your aprons and let's get started.


PRINTABLE RECIPE

Melt your butter. Use real butter please. Margarine is one molecule away from being plastic. Add the vegetables and saute very slowly.


I mince the vegetable very fine because I like this soup to be more of a cream soup.

Add the flour, cook for a few minutes, stir constantly. If you skip this step your soup will have a pasty taste. You need to cook the flour just a bit. Add warmed chicken broth slowly, whisking as you pour. This is prevent lumping.

Simmer for 2 minutes. It will thicken up. Add the blue cheese and stir until smooth. The cheese will start to melt. Add the milk and cream and heat to serving temperature. DO NOT BOIL because the mixture will curdle and you'll be crying in your soup.

Add sherry and pepper. Garnish with some green onions and some sour cream (if desired).

In order that I'm not doing everything at the last minute, I'll prepare the soup up to the point where the milk and cream are added. Turn the heat off. Just before serving, heat the flour mixture again and finish with the cream and milk.

Do not use the blue cheese that comes pre-crumbled and packaged in a plastic tub. This is usually very low quality cheese.

Please try this recipe and tell me what you think. It's always a hit around here.

This recipe was from my friend Linda, who lives in the area of Iowa where they make Maytag blue cheese.

MAYTAG DAIRY FARMS


Friday, December 18, 2009

Sugar Cookie Snowflakes

Yesterday was a busy day of errands before the cookie exchange. Thanks for your patience because I forgot to include the recipes for the sugar cookie and the royal icing.

Better late than never. Here you go.

SUGAR COOKIE ROLLOUTS

1 cup unsalted butter, softened
1-1/2 cups granulated sugar
1 egg
1-1/2 tsp. vanilla extract
2-3/4 cups all-purpose flour
2 tsp. baking powder
1 tsp. salt

Preheat oven to 400 degrees F. Cream butter and sugar together in a large bowl until light and fluffy. Beat in egg and vanilla extract. Mix flour, baking powder and salt; add gradually to butter mixure, stirring constantly. Do not chill the dough. Working in batches on a floured surface, roll out dough to 1/8 inch thickness. Cut out cookies using a decorative cookie cutter and bake for 6-7 minutes or until the edges are lightly browned. Makes about 3 dozen cookies, but the amount depends upon the size of the cookie cutter.


ROYAL ICING

3 egg whites
1-1/2 tsp. cream of tartar
3 to 3-1/2 cups confectioner's sugar

Beat egg whites until foamy, add cream of tartar and whip until peaks form. Add confectioner's sugar. Beat 5 minutes.

That's it. Now go to work and create something wonderful.

- - - - - - - - - - - - - - - - - - - - - - - - - - - - - - - - - - - - - - - - - - - - - - - - - - - - - - - - -

Does anyone know how to create a link to a separate printable recipe page? If so, could you please e-mail me? I'd like to make recipes available in a more print-friendly form. Thanks!