Showing posts with label Crafts. Show all posts

Thursday, July 29, 2010

Put Some Clothes on that Pillow

Thanks to everyone who shared their stories and preferences concerning their pillows. It's interesting to learn what you prefer. I've heard of those memory foam pillows and I'm thinking it's something The Farmer would love. Maybe for Christmas I'll get him one.

Yesterday I mentioned that I'd show you how to make your own pillowcases. Why in the world would you want to make your own pillowcase? I've noticed that the quilt shops that I frequent all have patterns and kits for making colorful cases. They're just so different than anything you might find in the domestics department of your local big box store. I love the idea of having something colorful and unusual to rest my head upon and just think about the dreams that those kinds of cases will jumpstart.

I also mentioned that I'd have an opportunity for you to help others. My friends over at Craft Hope are just coming off their biggest project ever. Project 8 was providing towels for the Gulf coast oil clean up. Their hope was to collect 15,000 towels. They collected 70,000 towels!!! These women can make things happen..... and so can you.

For Project 9 they are working with ConKerr Cancer Center to provide colorful pillowcase for terminally ill children in hospitals across the U.S.

READ ALL THE DETAILS HERE

The pattern provided by ConKerr Cancer Center is provided HERE

OK, let's get started with sewing our pillowcase. We're going to start with our two pieces of fabric.

Main fabric - 26 1/2 x 40 1/2 inches
Border fabric - 10 1/2 x 40 1/2 inches

I don't have a lot of children's fabric in my stash but I did find this colorful animal print. Perfect..... lions and tigers and otters, oh my!!!

Photobucket

For my border print I chose a pink and white gingham.

Photobucket

The first step is to fold the border fabric in half lengthwise, with the wrong sides together. Press the fabric.

Photobucket

We're going to want to finish the seams so that the edges don't fray. A serger machine creates this edge.

Photobucket

See how the machine has zig-zagged thread over the edge to encase it, all while sewing the straight seam? Well, I don't have a serger and neither do many hobby sewers so I'm going to show you how to actually encase the edge, making a French seam. It's really not hard once you've seen it done.


Pin the long edges of the two fabrics together with the border attached to the wrong side of the main fabric. It sounds wierd because that means your seam would be on the outside of the pillowcase. But that will change in a minute.

Photobucket

Sew along the long edge, using a 1/4 inch seam. I'm going to switch to a sample swatch because it will be easier to see what I'm doing. That animal print is a little busy.

Right sides of fabric facing out.

Photobucket

Sew the 1/4 inch seam.
Photobucket

Open the seam out and press flat.
Photobucket

Fold over with raw edges inside and press flat.

Photobucket

Encase the raw edge by sewing a 5/8 inch seam along the edge.

Photobucket

This is a french seam seen from the inside.

Photobucket

I like to take it a step further and do a line of stitching that makes that piece lie flat. Just stitch right along the edge on the wrong side. Here's what it looks like after stitching viewed from the wrong side.

Photobucket

And from the right side.

Photobucket

At this point everything is encased, flat and looking all professional.

You can do this on all edges of the pillowcase including the border, the long edge and the short edge. Do them in this order.

Photobucket

After sewing the long edge you'll be basically left with an open ended tube so when you go to sew the encased seam down flat you're going to need to do a little "scrunching" to get it through the machine without catching fabric. Just go slow.

Here's the finished pillowcase which I will be donating to the Craft Hope Project.

Photobucket

If you don't want to use the method of creating a French seam, just sew in the order given and finish the edges with pinking shears.

Another idea is to use a decorative stitch on the area where the main fabric and border meet. I would have done that EXCEPT my modern electronic machine with the fancy stitches has decided to have a nervous breakdown. Yeah, and she's only a year old.

Many thanks to my friend made of cast iron, Beverly, who faithfully performed her straightforward and straight-stitching duties flawlessly. Gotta love a vintage machine!

Photobucket

Thursday, December 3, 2009

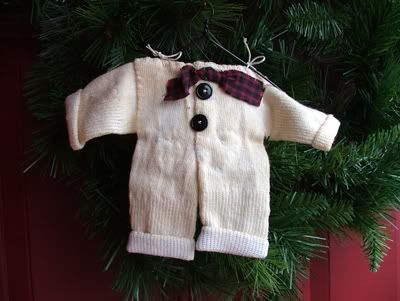
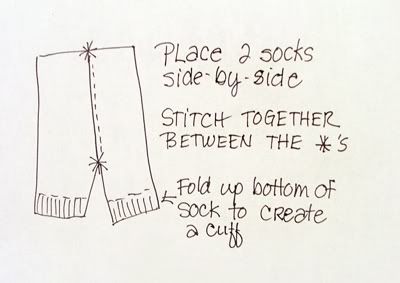
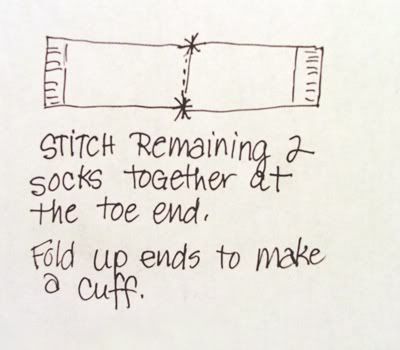
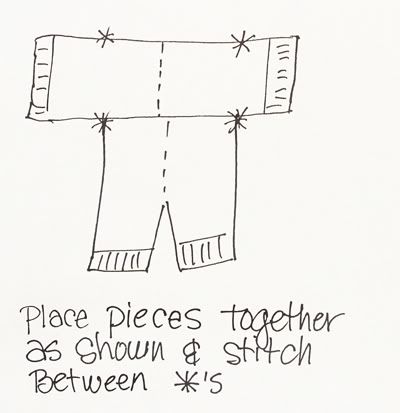
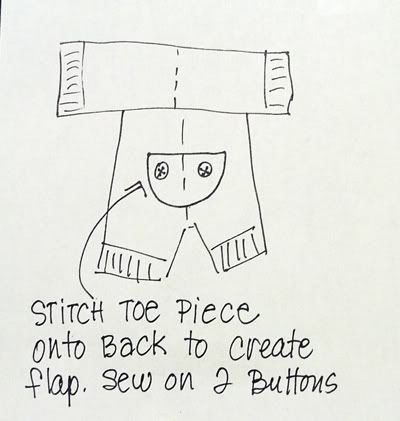
Santa's Long Johns

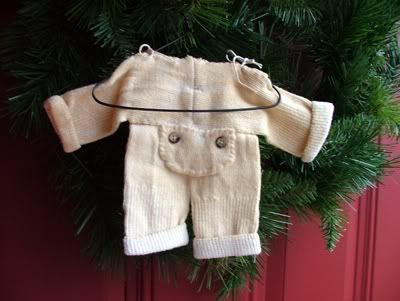
Today I'm going to show you how to make a cute holiday decoration called Santa's Long Johns. Don't worry, they're easy to make.


Gather together the supplies you're going to need.

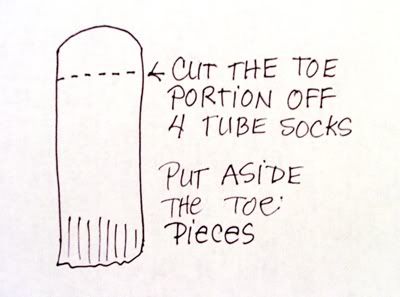
Two pair of children's tube socks (socks with heels will not work)
needle and thread
scissors
buttons
small scrap of fabric
Doll's coat hanger

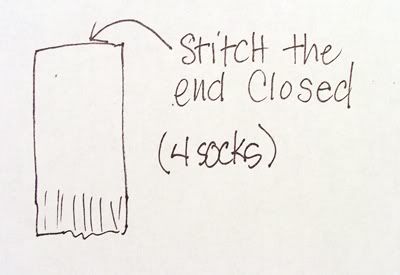
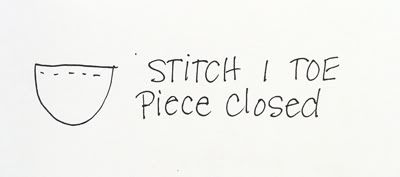
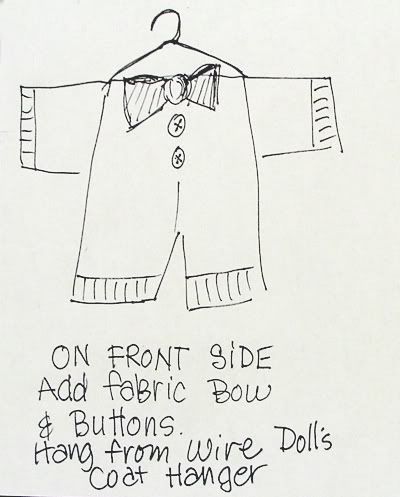
Sorry, I have to show you how to do this using my stick figure drawings because I couldn't find the tube socks on my shopping trip yesterday. I hope they still make them!


It's that easy. I tea-dyed this pair of long johns. Just brew up some strong tea and allow the long john's to soak for about 15 minutes. Rinse and dry flat.

I hope you give this a try. They are so cute.

By the way, did you notice my red door? Do you remember when you helped me pick the color?


Thursday, October 29, 2009

Not Your Grandma's Granny Square

These days I'm trying to curb my habit of buying magazine. They're dropping like flies so perhaps everyone is being more selective about how they spend their "magazine cash".

As far as the crafty/cooking magazines, they must have more than one interesting project in order for me to spring for the 5 bucks (or more). I'm shocked that some of the specialty publications, for Halloween or Christmas, are running $14.00!

I'm always impressed with Interweave's Crochet magazine. Thankfully for my wallet, it's only published 4 times a year. The latest issues had something that called to me, unfortunately we were facing a $500 car repair so I slipped the issue back on the rack and called it a day.

I kept thinking about how beautiful the project was and when I found the 40% off any item coupon in the Sunday paper I returned and snatched the last copy up.

It seems I'm not alone in my love for this afghan. You remember afghans, those Brady Bunch orange, brown and yellow throws in undulating waves, or the multi-colored Granny squares.

I know many, many families that had at least ONE grandmother who crocheted like a madwoman so that each grandchild could have their own afghan on their wedding day. Likewise those baby afghans for the baby shower.

No matter if they're colorscapes from the past, they are cherished and loved because of who made them and the thought behind grandma-made afghans.

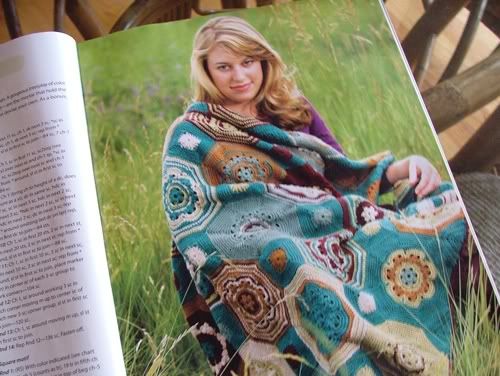
Enter the Not-Your-Grandma's-Granny-Square afghan. That's not the official name but that's how I refer to it.


Photo of Interweave Crochet project, Winter 2009.

I'm in love with this afghan. The colors are updated and the design is a modern twist on the granny square. It's a large project but I'm determined. I crochet every evening while I'm watching (listening actually) to TV with the Farmer.

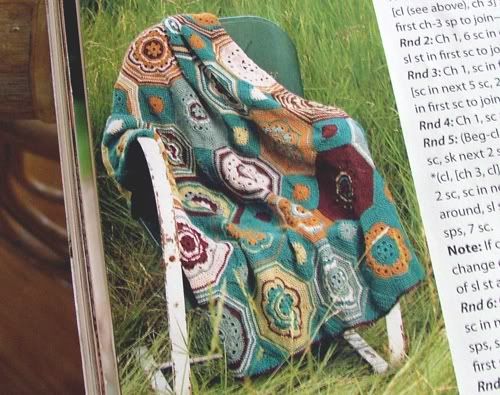
It's called the Moorish Mosaic, which is the perfect name because it's reminiscent of Moorish tiles.


Love the vintage metal chair. Someone had fun styling this photo.

I love the fact that even though each motif is the same pattern, they are rendered different by the mix of colors. This color scheme is terrific but I might tweak it just a bit to fit into the decor of my bedroom.

Do you crochet? Do you have a wonderful project that's calling to you? We all need one because............. winter is approaching!

Thursday, May 14, 2009

Novel Jewelry

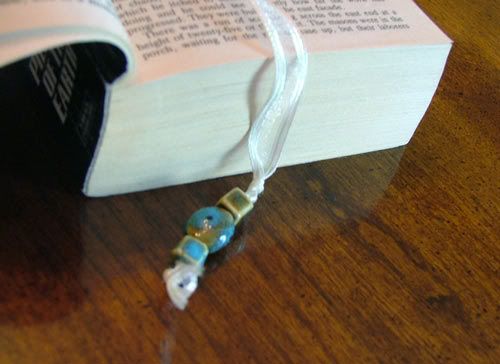
If you're like me, you're always scrambling around to find a bookmark. Where do these things go?

When Cindy LaFerle sent me a copy of her book "Writing Home" she also included a wonderful laminated bookmark. It was my favorite, but somehow I've misplaced it, leaving me to scounge around for bits of paper or a bobby pin.

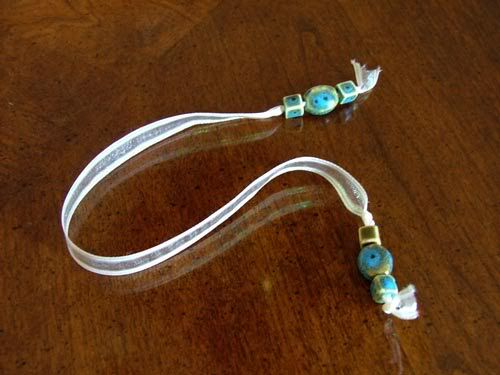
Last weekend my sister gave me a cool bookmark that she'd made. It so clever and I easy. I call it my novel jewelry (although I rarely read fiction).

Cut a 17 inch length of flat ribbon. This is 3/8 inch wide.


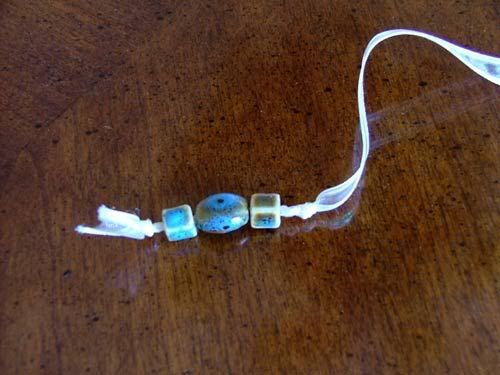
Make a knot in one end. Slide some decorative beads. In this case she used some turquoise colored pottery beads.


Tie a second knot that is close to the last bead, to keep it from sliding around.


Repeat at the other end, starting with a knot.

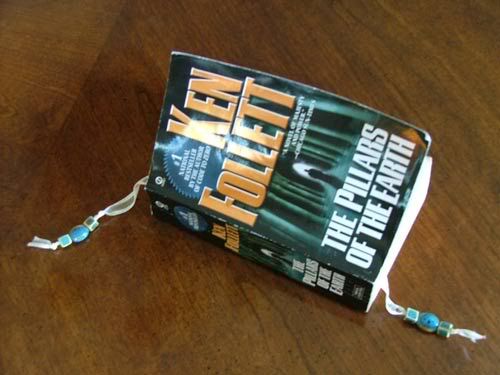
And there you have it.


Oh, what's that? Yes, I did say I rarely read fiction but after my trip to Mexico and the tour of the Cathedral in Mazatlan, my friends told me I simply must read this book.

Wednesday, April 8, 2009

Wash Day and Water Feature

Many of you have requested the recipe for my homemade laundry detergent. I just finished making a batch and I don't have enough empty milk jugs to make another batch. If you can wait until next week I'll be ready to do it again! Yes, we have lots of laundry here in the Farmer's house. I'll do a proper tutorial including my emulsification technique.

My sister is so clever. She's posted a tutorial on how to make a water garden bubbler feature using bowling balls! It's pretty easy and wait until you see how cool they are. There's also a wall fountain made from an old fluorescent light fixture. It's crazy clever

BOWLING BALL BUBBLER & FLUORESCENT WALL FOUNTAIN

Friday, April 3, 2009

Easter Banner Project

I'm going to share a great little project with you today that you can do by yourself or with children. It's an Easter banner that is easy and fun.

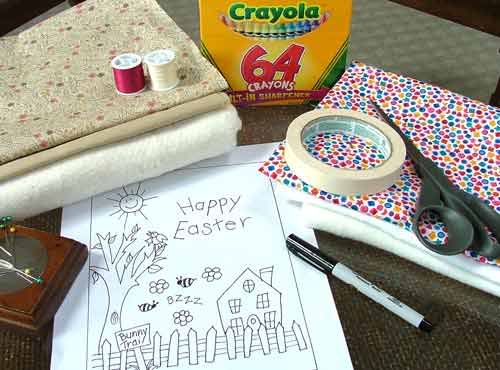
First we're going to get together all our supplies:


Muslin or broadcloth - about 14 x 16 inches
batting
backing fabric
scissors
straight pins and a needle
fine point permanent marker
masking tape
thread
crayons
pattern

I'll be giving you instructions at the end of this post on how you can get the pattern for free.

If you notice in the above photo, I have two stacks of fabric. One stack is a color combination that will produce a primitive banner and the other will become a brighter banner. It just depends on your preference.

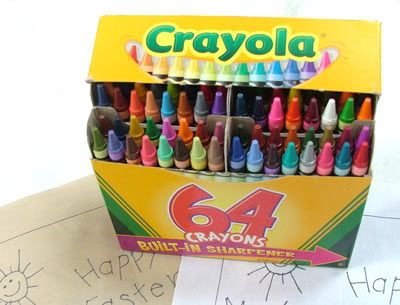
First and foremost this project is the best possible excuse to go out and buy a new box of crayons. Happiness for under $3.


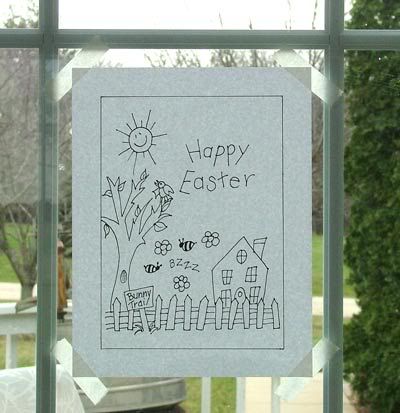
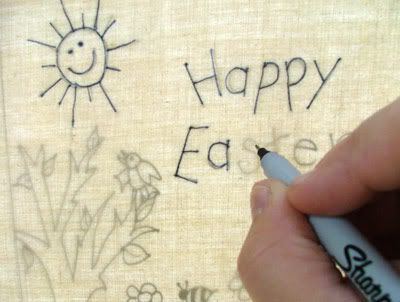
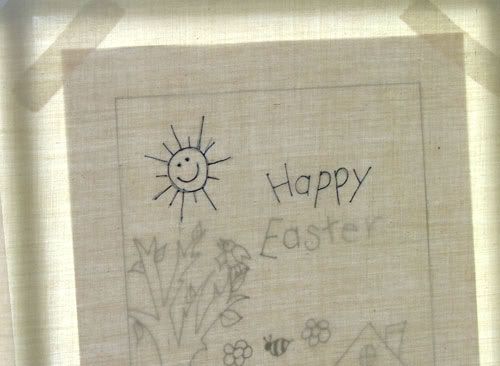
The first thing I'm going to do is take the pattern and tape it securely to a window. This is going to serve as a substitute light box. If you have a light box, use that.


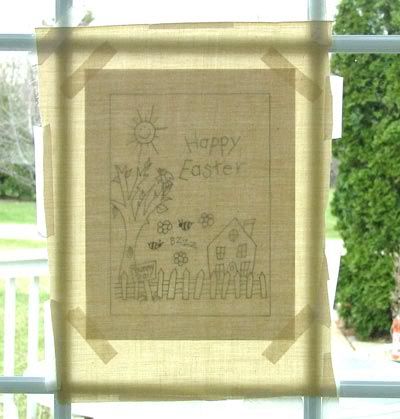
Using a piece of fabric that is larger than your pattern, tape it so that it completely covers the pattern.


Isn't this great? We can see right through the fabric. I guess I don't need to mention that you need to be doing this during the daytime!
Using the black permanent marker we're just going to start tracing the lines.


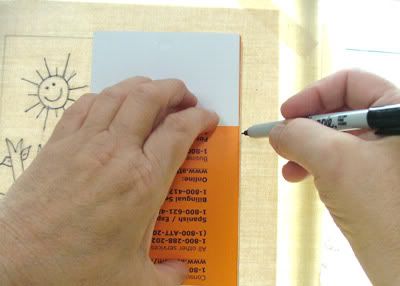
Once the main design is traced, take a ruler or a straight edge and trace the outer edge lines.


I simply used a brochure that was sitting on the desk. When you've traced the outer lines you'll remove the fabric and the pattern from the window.

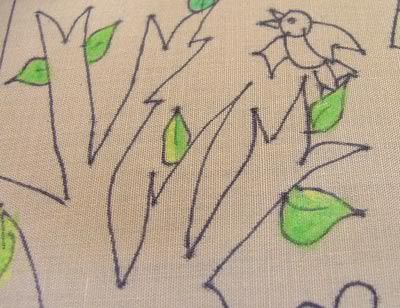
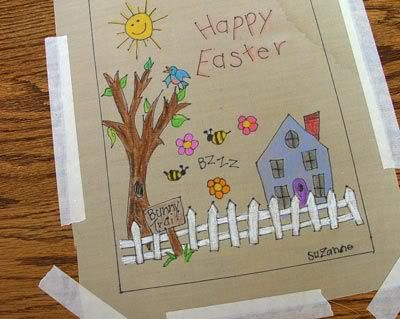
Now the real fun can begin. Sit down at the table and start coloring. Tape the fabric to the table so that it will remain taut while you color.


If you notice as I colored in the leaves I used two different colors of green and shaded it. Keep coloring. There are no rules except try to stay within the lines! I would suggest that you keep a scrap piece of your fabric off to the side in order to test colors before you commit. Press harder for more intense color and lightly for soft color.
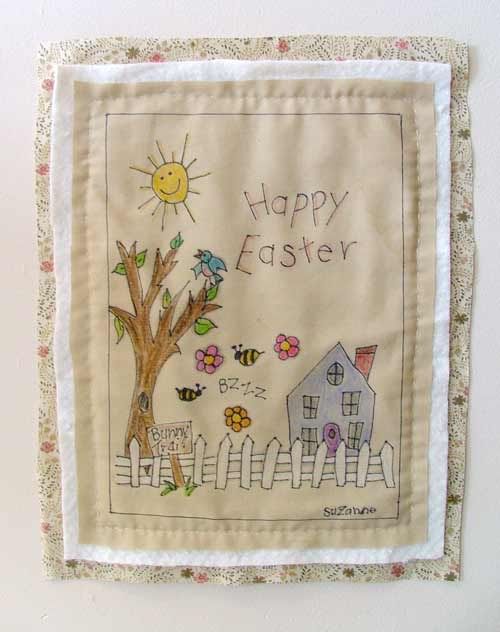
Here's my coloring on the darker colored fabric.


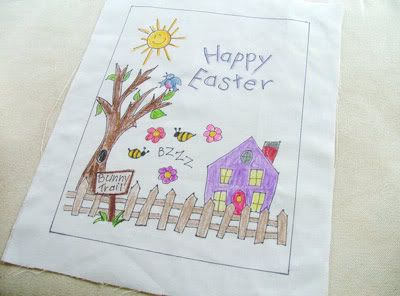
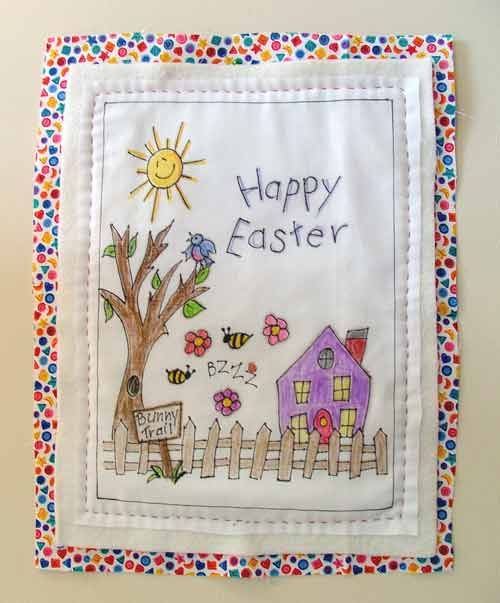
Here's the banner on the white colored fabric.


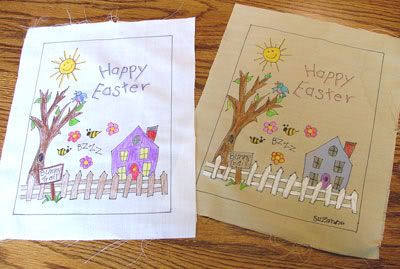
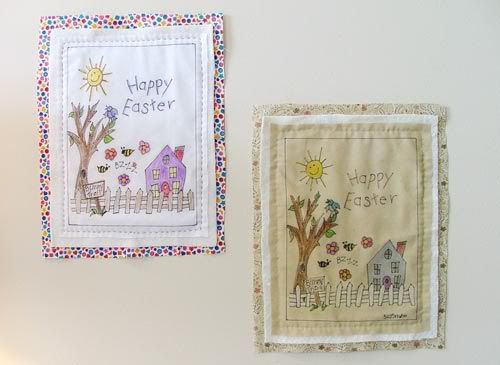
Here are the two, side-by-side.


You'll notice that on the tan fabric I can use white for the fence posts and on the white fabric I need to use brown.

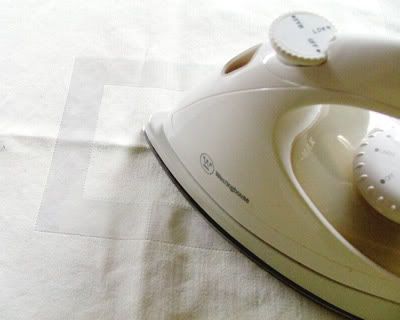
We're done with our coloring and we need to set the color to the fabric. Place the banner face up on your ironing board. Cover with a press cloth or a piece of white paper.


Set your iron to the cotton setting, dry - no steam. Iron for about 5 seconds. Don't push the iron back and forth, pick it up and move it over until the entire area has been covered. Allow to cool.

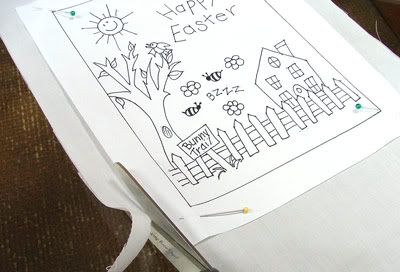
Place the paper pattern over the fabric piece, pin down and cut out. My pattern is on an 8-1/2 x 11 inch of typing paper. What we're doing is using the paper pattern as a guide to trim the fabric to final size.


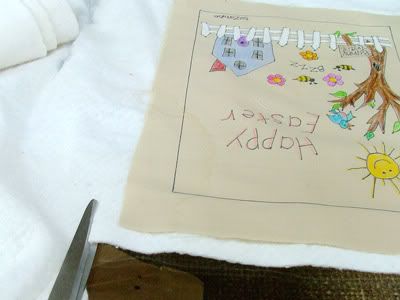
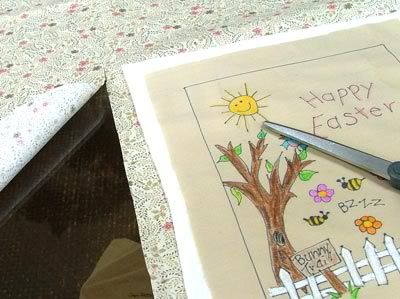
Make a sandwich out of the colored panel, the batting and the backing fabric. Each layer is just slightly larger.


No need to be precise with this. Just lay the colored panel over the batting and cut. Eyeball it.

As you can see the print fabric is facing up because it's going to be peeking out from under the batting. Again, I'm just cutting freehand.


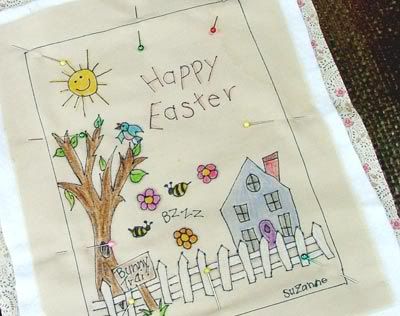
Pin all three layers together so that the fabric doesn't shift or bunch up.


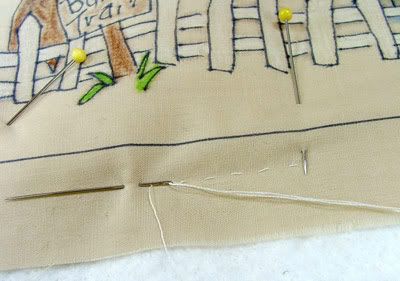
Using whatever colored thread you'd like take a running stitch around the edge to bind all three layers together.


Attach a small plastic drapery ring, or a loop of fabric or ribbon to the back for hanging.

Here are the two finished banners:


The primitive one -


and the brighter one -


Did that all make sense? I hope so.

This project is so much fun and you can draw your own design or have the kids sit down and draw on paper, trace and color their own designs. You can do these for every season, birthday banners, whatever!

TO GET THIS EASTER DESIGN FOR FREE:
- Email me at: Abscissa63@aol.com
- Put the words "Easter banner" in the subject line.
- I will e-mail you the PDF file.

This terrific technique was developed in the mid-1990's by a craft designer named Ronda Matney. Her patterns were produced under the name "Plain Brown Wrapper" and were a series called, "Don't Go Out of the Lines". They were larger and more detailed than the simple design I've created. I bought almost every one she produced. I've searched the web and I don't think she's publishing them any longer. But if you're interested you might be able to find some on Ebay.

Thanks for joining me for this tutorial and let me know if I've forgotten anything or if it's not clear.

Bottom line - - get together as a family or a group of friends and have some fun with this!