Perhaps I should just go into the bias-tape-making business! No, maybe not.
I'm going to show you the method I learned in a quilting class. A yard of fabric makes LOTS of bias tape. The piece of fabric that I chose for the Make-Do Apron was only 26 inches long and I got 8 1/2 yards of bias tape from that. So, let's get started.
You're going to need:
- fabric
- a ruler
- a disappearing marking pen
- pins
- an iron
I'm going to take a moment here to say that if you want to learn how to sew, you're going to need to make friends with your iron. There's no way to get good results unless you press, press, press and press some more.
Lay out your fabric on a flat surface. Grab the selvage edge and fold it over to line up with the opposite edge, like this:
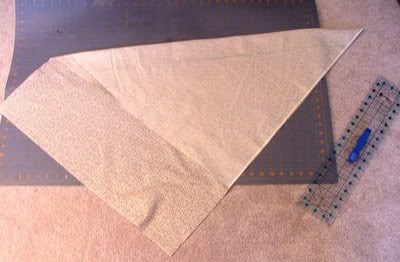
Finger press the diagonal. To finger press just put pressure on the fabric, open the fabric and you'll have a diagonal line. Mark this with the pen and a ruler. Now you need to decide how wide you want the tape to be. You're going to be folding it in twice, so figure the final width X 4. I just make the 2-1/2 inches wide and after it's all folded it's a nice final size.
Using your ruler, make marks every 2-1/2 inches and "connect-the-dots". Do this all across the fabric.
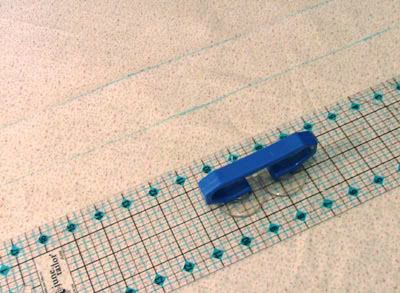
It's going to start looking like this:
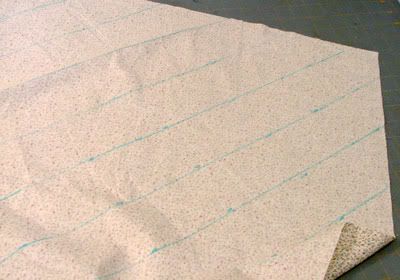
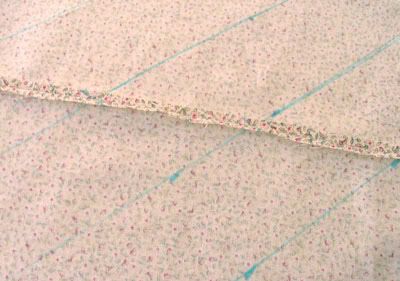
Now you're going to match the edge together, but instead of lining up exactly, you're going to move the fabric to the next line, so it's jogged one over. Pin the edges, matching the blue lines.
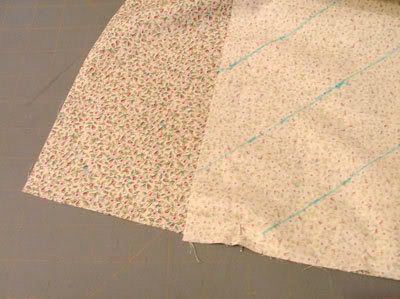
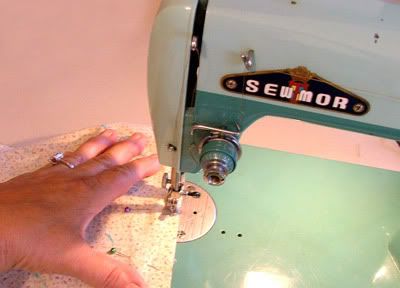
Sew a 1/4 inch seam.
Here's my sewing machine "Beverly". She's been complaining that she's not getting enough face time here "At Home.....".
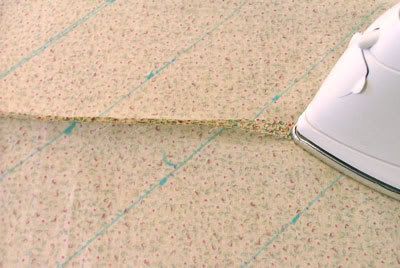
Press the seam open and flat.
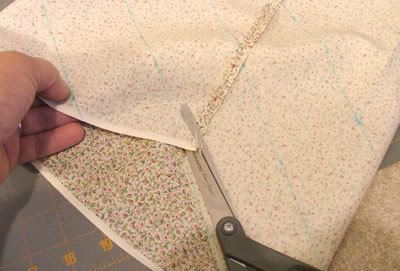
Now start cutting on the line. What's going to happen is that you're going to be cutting one continuous strip around and around the tube. You're going to end up with long strips of bias cut fabric.
Fold the tape in half and press.
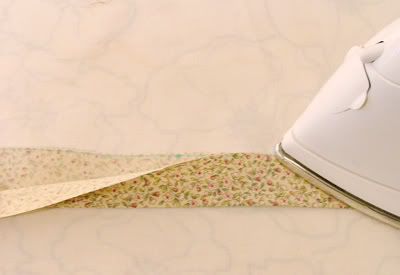
Open it up and fold one edge to the center line. Press the outside edge being careful not to press the center line flat.
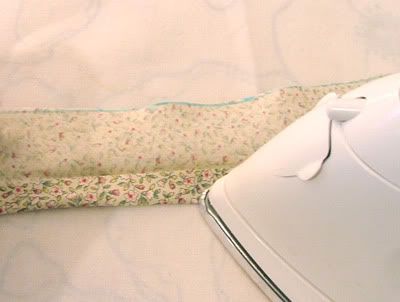
Fold the opposite side in, but this time don't go to the center line. Make this a smaller fold.
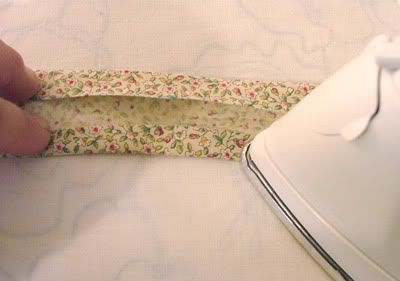
When it's folded it will look like this.
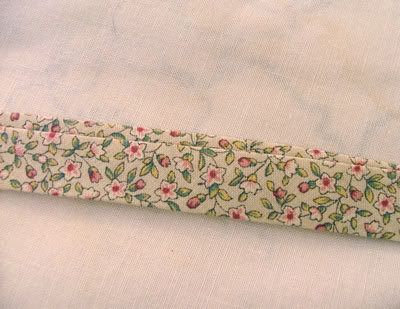
That's what you're looking for, one wider side and one narrower side.
If you have any questions, please feel free to ask. Now.....go make some bias tape in fantastic patterns!!





19 comments:
Even though I took home ec ALL 4 YEARS in high school( a million years ago) and entered my sewing projects in 4-H competions, I have never been shown how to make bias tape like that (with the tube approach). It makes so much sense! We always just cut the bias strips, than matched them on the ends and stitched together strips to form the length desired. What a great idea--thanks for taking the time to share that technique.
Wow, your tutorials are wonderful! Maybe one of these days I will actually try this! :)
OH, thank you thank you thank you!! I've always wondered how to make bias tape. I just end up buying the boring kind in the wrapper, but I'll be boring NO MORE!!
I've made bias tape before, but, as Dana mentions, I have done it the more labour intensive way, which put me off doing it, most of the time..
Thanks so much for this tutorial, this is going to make it so much easier to make bias tape in future! It's a brilliant technique!
No more boring purchased tape !!!!
I sewed when I was a teen. It gave me a crink in my neck. I don't think I will pick it back up except for when I must teach my daughter a few things before I pass her on to someone more qualified (as in, someone who actually likes it and didn't have a boring experience as a kid!). But I wanted you to know I am still here. Even when you are posting about sewing bias tape and I don't sew. I am faithful.
I would really like to see a quilt you made though. I love the quilts we actually use and don't just display enough that one day I might force myself to learn to (gulp) sew one. But only to learn with my daughter...
You make it look easy, but I've never been able to sew. I can kill a sewing machine by looking at it. They don't even let me in Joann's anymore!
I knew it! I should've waited! What a great technique that is and it makes me think that perhaps I'd be willing to make some Christmas gift aprons after all. Honestly, at three this morning, I was ready to tear my hair out. I was pretty sure that you didn't want me asking no questions at that hour! :D
Thanks a million, Suzanne!
Dana - Someone much smarter than me came up with that method. It was certainly someone with spatial and geometry skills.
Carolyn - Thanks. You really need to try it. Just once.
Heather - The hardest thing to explain is the part where you jog the fabric over one notch. I'm the kind of person who must SEE it to LEARN it.
Karen - I couldn't even figure out how to do it the other way. I'd sew the pieces together wrong and when I opened it out they'd be going in different directions! I KNOW you know what I'm talking about. We've all done it.
Tiffany - I swear I have the most faithful readers ever. I don't know what they're waiting for though. They stick around when I'm driving my tractor into a big hole and they stick around when I'm sewing. All for what? Perhaps I'll drop a funny story about the farmer. I usually wait till he's out of town.
Kendra - My friend Ellen says the same thing, which is crazy. She's a PhD, a published author and smart as a whip. I guaranteed her that she can sew. I've just got to make the time to show her. You can do it too!
Vee - You're kidding right? I was UP AT THREE...couldn't sleep. I would have answered your question. I think "At Home......" should be open 24/7, don't you? I could be doing homemade pasta at 4 in the morning for Tressa in Norway and Robin in South Africa! The rest of you could join in as you wake up.
- Suzanne
Being a lazy non-sewer, the tutorial was lost on me (although very practical). I did, however, notice that gorgeous, blue machine you have. I would definitely display that in my home, and it would sit, beautifully, untouched. I am so shallow...
This would have been a fabulous post for me if I knew what bias tape was. It looks lovely.
Do you use it to tie up all that toilet paper you buy in bulk? ha!
hey.... this is great! Honestly, at first I just didn't get it at all when you said about joining the blue lines and .. ..sewing it one over..huh?... that really had me... UNTIL..I saw the tube! Hah! I get it now! Thanks so much for the piics... I can do this one of these days....even a non sewer like me! wooweee...I am gonna make me an apron!!
Thanks for the how to on making bias tape. I am going to make lots of it. You did a great job on showing us all how. Have a great week.
Hugs;
Alaura
OMG - your tutorials are better than HGTV! I've learned more about sewing from you in the past month than I did in my high school home-ec class! Keep it coming!
I am laughing my hinder off by all those comments!:)
I can't sew either and my mother is a professional! And I also have a entire blue machine sitting here with all the parts and what not original in the box. Offers anyone?:)
Mornin'! I just found your blog... I forget how... but I really like it! I'm just learning to sew a little (not brave enough to use an actual pattern yet! LOL), and I like this tutorial. At the risk of sounding dumb, my question is... other than the apron, what would you need that much bias binding for? And why does one side have to be shorter than the other? You sure picked a pretty fabric to make it with!
yeah! Thanks for this - I can't wait to make some pretty bias tape.
What an awesome technique :)
I always hated trying to match up the little ends . Thanks so much for posting this .
Thank you for the great tutorial. The photos are a big help too. I had read online how to make bias tape but most just had diagrams. Now that I see what to do I feel a little braver. Still I may start with a muslin version first before cutting into my cute fabric.
amazing tutorial and I think with all this work your aprons need a higher price tag.
Post a Comment