I've always been a fan of the garden gazing globes. Our neighbor had one when I was growing up and I was fascinated with it. I've purchased at least three of these gazing globes in the last few years and they do not survive the wind of the Illinois prairie. I got tired of buying them and so I decided to create something that was indestructible. I designed a garden ornament made from a bowling ball.
Did you find your bowling ball when you were out shopping? I gave you a heads up last week, but don't worry, you can always print this out and get the supplies when you're ready. This actually makes a great wintertime project. I worked on these in the evenings while I was watching television.
We're going to need clear silicone sealer or glue. I've used both and it doesn't matter. The silicone doesn't degrade in the weather and it's perfect for this task.
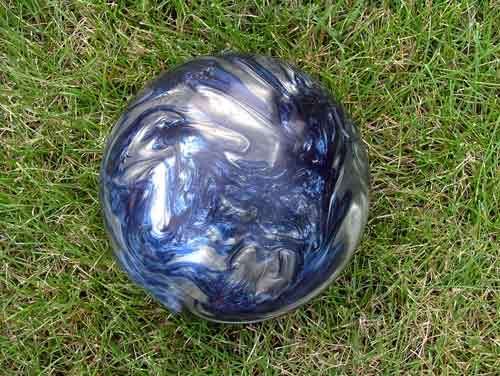
We're also going to need a bowling ball. This one is actually pretty enough to sit in the garden without altering it. But this belongs to the Farmer's Son and so I don't dare use this!
Break up some old plates or pottery. The pieces can't be very large. They need to be in small pieces to adjust to the curve of the ball. Just fit the pieces one by one. It's actually fun, like working a puzzle. Don't worry about covering the finger holes because you can just turn that area to the underside when you set it out into the garden.
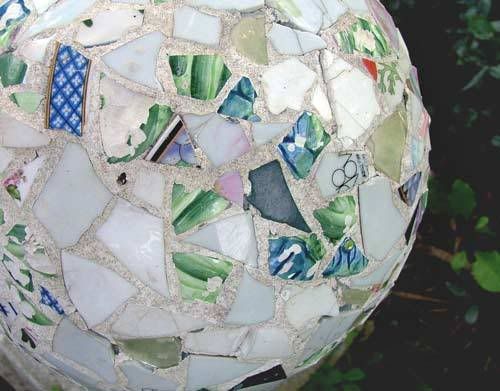
After you're through glueing all the pieces you can use grout to finish it off. Luckily I had some left over from another project.
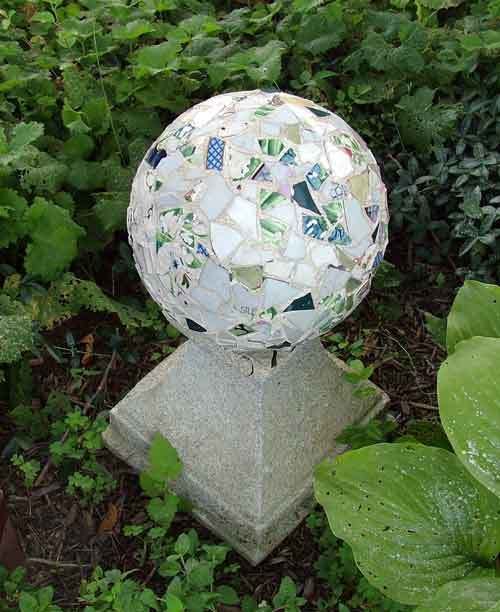
You can also use this method to cover flower pots.
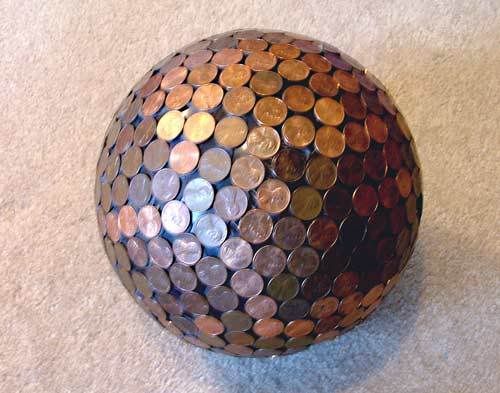
Here's another one I just finished. This is called my "Abraham Lincoln Garden Ball". It's covered with pennies. This took longer to complete. You can shine it up with copper cleaner. Out in the weather it will develop a patina.
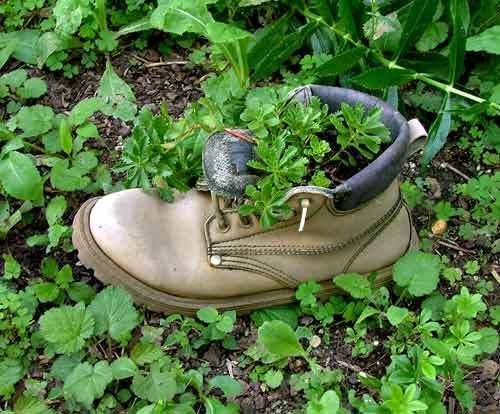
Here's another idea for the garden. I have several shoes and boots that I've filled with potting soil and planted with succulents. They're perfect because the excess water naturally drains out through the seam lines. I haven't touched this plant in about 4 years. It overwinters perfectly here in the midwest. Really big "disco" shoes are a terrific garden ornament.
I hope you've gotten some ideas and inspiration today. Let me know if you try making these bowling ball garden ornaments.
Have a wonderful day everyone!





23 comments:
"After you're through glueing all the pieces you can use grout to finish it off. Luckily I had some left over from another project."
Hahahahaha...that's the understatement of the year! Speaking of which, are you done with that project? Hope so!
These creations are wonderful...very clever and lovely. Now I'll have to add a bowling ball to my flea market list.
I love your creative gardening!
Very nice! I have a friend who also makes garden balls from bowling balls. She has some with the flat glass marbles glued to them and they are so pretty! I love your's too, though. I think having differnet ones is great!
I also love the planted shoes! Love the old work boot!
Rats. I pitched my bowling ball when we moved 3 yrs. ago--I KNEW I should've kept it! Those look really fun.
Love the penny one the best and yes, I also caught the grout comment and laughed out loud.
Janet
What a great idea! My favorite is the one with pennies. What is the plant in the boot? Blessings, marlene
Well, well...aren't you the cleverest? I'd like to see the prairie wind blow that baby away!
uh...on second thought...if that garden ornament is airborne, I'd want to be right here - hundreds of miles away!
I love the boot. I've been using my husband's blown-out work boots as front step 'planters' for about 5 years now. Last year and this year both they hold hot pink ivy geraniums and varigated ivy.
I'm telling you, when $350+ are invested in a pair of custom boots, you try all sorts of ideas to re-purpose them once rebuilding and repair options are exhausted.
What amazes me is that anything green and living can survive and even thrive! I was positive the roots would be sending up pleas for rescue the first year I lowered flowers into the rather 'aromatic' confines of their new pot.
I've also used my Little's ripped out bright yellow rubber mud boots - planted pansies in them. Those are so darling, but the sun has faded them to a pale, sickly yellow after the third year. Guess I'm going to have to find some more for next year.
My friend Kay has these in her garden and I could not believe they were formerly bowling balls! It's a great project! I think I might give it a try.
Oh what fun! That first one must weigh a ton, though! I guess you just have to be careful not to drop it on your foot when placing it in the garden. LOL
xoxo,
Mary
LOVE the penny ball. Definitely going to do that one here! Any guess as to how many pennies it takes. I know it probably depends on the size. Size does matter. ;-o
How did you mount the ball to the deck support block? Can you snap a photo of the underside of that for us?
Looking forward to the next “project” you share with us!
Can I just say it once again, you are my hero!!! My stepmom loves gazing balls, but like you they always get broken...I am so on the penny one. She is going to love it! (We are only allowed to give homemade Christmas gifts.)
I saw a link for bowling balls like that before. Yours turned out great!
Very, very cool !!!
Something I'm definitely going to try. have to search in the depths of he spare bedroom's closet ... I think I have an old bowling ball in there.
I've seen the old shoe idea in other people's gardens. They look really good in the right setting..
Somebody, a couple of blocks from us, has an old toilet plonked in his garden as a planter. never fails to get amused looks. :-)
Had to laugh at the 'leftover grout' comment :-)
These are just so fabulous. I never would have thought of this. You must have a lot of 'spare' time to 'strike' up these projects. I on the other hand wander in the 'gutter' trying to find a 'pin' to sew a quilt.
I have always looked at bowling balls at garage sales and wondered if there was a way to turn them into gazing balls! Brilliant.
What great ideas I have seen the bowling ball before, I just have not been able to find one. I was thinking about our bowling alley maybe they have some old ones they want to give away or sell cheep. Thanks for sharing all the great ideas for your garden.
Have a great week.
Hugs;
Alaura
I just love this idea, but what did you use for the base and how did you attach it, curious people need to know. Thanks
Beautiful! I love them! I hope we see a picture of the penny one after it gets its patina!
Wow - those are AWESOME! I love how the grout totally finishes off the project. I have to re-grout my kitchen - this is going to be a pain in my tushie...
I have several decorated bowling balls in my garden - one covered in pennies, one in rocks, glass marbles, and one covered in 16 penny roofing nails (we call it the "tetnus ball". :o) You can see a 2-part tutorial I wrote to decorate bowling balls here:
http://creativehomelife.blogspot.com/2007/06/craft-long-garden-junk-bowling-balls.html
and here:
http://creativehomelife.blogspot.com/2007/06/lets-glue.html
The one with the pennies is cracking me up!
BTW, I host a "blog carnival" about green crafting, the next issue will be posted at craftingagreenworld.com. I'd love to link to this post! Not republish it, just link to it and recommend that people check it out. Please let me know if that's ok with you. Email me at greencraftscarnival at gmail dot com if you get a chance.
Thanks!
-Skye
very Creative . very good i have read all the comments in your blog and i agree with them . thanks for sharing your post . have an idea about metal wind spinners ? try this accessories very nice .
Post a Comment